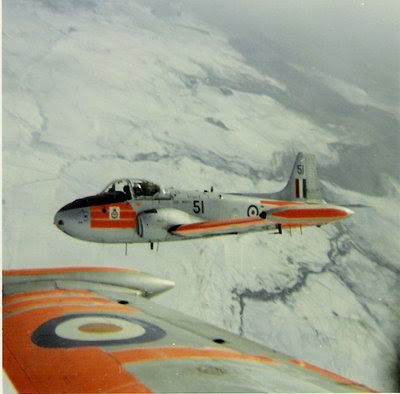
 Please forgive me but I could not resist the temptation to put in this old picture of my Royal Air Force days in the 1960s flying Jet Provosts over the snowy North York Moors. I have been feeling nostalgic lately.
This may be a good time to remind all pilots that it is very EASY to access any page. Just go to the "green" Blog Archive index on the right. Click on the WHITE TRIANGULAR ARROW to open any month or year, and point and click on the underlined subject or PPL exercise that you want to look at >>>>>>>>>>>>>>>>>>>>>>
Today, in Navigation class, the question was asked, "Which method should I use? Wind UP or Wind DOWN on the Dalton computer?"The answer is use either method, BUT know the characteristics (or quirks) of each method.The "quirk" of the WIND DOWN method is that initially with TRACK at the INDEX, the TAS is placed on the centre line under the centre bore. We know that we cannot mix TAS with TRACK, because TAS goes with HEADING. Ground Speed (GS) goes with TRACK. But don't worry, it gets sorted out in the final movement of the plotting disc.The "quirk" of the WIND UP method is that the "DRIFT LEFT" and "DRIFT RIGHT" stamped on the top of the fixed outer disc have to be read the opposite way round. Provided that this is remembered, I would favour the "WIND UP" method, because TAS is NOT placed on the centre line with TRACK. TAS is placed under the "X" at the end of the wind "vector" on the curved speed line. GS is now read under the centre bore.The R.A.F. taught the "WIND DOWN" method. Why? Beause it is logical. On the "Wind Triangle" or "Triangle of Velocities" the aircraft is "downwind" of the HEADING VECTOR. The wind blows the aircraft from the HEADING to the TRACK. This whole methodology is explained in PPL Ex 18(i): NAVIGATION: The "Dalton" Dead Reckoning Computer. Nowadays I favour the WIND-UP method.
With BOTH methods we start with given information. This "given" information is: 1.)True Air Speed* (*See previous AEROfile entry for arriving at TAS). 2.) True Track (TRK T) and 3.) Wind Velocity (WV). Here is an example: TAS = 110. True Track = 050. W/V = 360/30
First the "WIND DOWN" method:
The wind direction (remember the wind is always FROM) is placed under the INDEX at the top of the instrument by rotating the plotting disc. The wind is 360/30. Rotate the disc until 360 (or "N") is under the "INDEX". Now, from the CENTRE BORE, measure "30" DOWNwards. Make a mark (a dot or a cross) at this point. Now rotate the disc to align the True Track 050 with the "INDEX" AND slide the disc to place the CENTRE BORE over the TAS 110. Observe the angle of the DRIFT LINE. It is 15 degrees on the RIGHT hand side of the plotting disc. (Note: The top right and left of the outer fixed disc states "DRIFT LEFT" and "DRIFT RIGHT" respectively). Here the drift is RIGHT therefore the heading is to the LEFT of the TRACK (the aircraft drifts towards the track!) Rotate the disc 15 degrees LESS than the TRACK value of 050 i.e. 035 under the INDEX. OBSERVE the DRIFT ANGLE NOW. It is now only 12 degrees. RE-ADJUST the figure under the INDEX to read 038. NOW THE DRIFT ANGLE (12 degrees) AGREES WITH THE DIFFERENCE BETWEEN THE TRACK AND THE HEADING (050 and 038 = 12). AND the plotting disc has "apples" and "apples" together and "pears" and "pears" together, i.e. TRACK with GS and HDG with TAS. The HDG and TAS have ended up on the centre-line. The Ground Speed (GS) is now read at the curved speed line under the "X" . It is 89. Bingo! We have True Heading (038) and Gound Speed (89).
Now the WIND -UP method:
The wind direction (remember the wind is always FROM) is placed under the INDEX at the top of the instrument by rotating the plotting disc. The wind is 360/30. Rotate the disc until 360 (or "N") is under the "INDEX". Now, from the CENTRE BORE, measure "30" UPwards. Make a mark (a dot or a cross) at this point.
Now rotate the disc to align the True Track 050 with the "INDEX" AND place the "X" of the wind vector over the TAS curved line at 110. Observe the angle of the DRIFT LINE. It is 12 degrees on the LEFT hand side of the plotting disc. (Note: The top left and right of the outer fixed disc states "DRIFT LEFT" and "DRIFT RIGHT" respectively). Here the drift is RIGHT therefore the heading is to the LEFT of the TRACK (the aircraft drifts towards the track!). THE "QUIRK" WITH THIS METHOD IS THAT ALTHOUGH THE INSTRUMENT HAS "DRIFT LEFT" STAMPED ON THE TOP (ON THE SIDE OF THE DRIFT LINE) WE HAVE TO REVERSE THIS. THE DRIFT IS ACTUALLY RIGHT! Other than this little quirk everything is fine and dandy. There is no adjusting to do. Simply subtract 12 degrees of drift from the TRUE TRACK of 050 = TRUE HEADING of 038 degrees, and read the Groundspeed under the centre bore = 89 knots. Bingo again!!
 Hello from the flight deck. Here is a question for you. Is good leadership important?

